The tubes are mounted between the camera and the lens. They have no optics and the better ones will have some mechanism which allows the camera body to communicate with the attached lens. This enables autofocus and automatic aperture control.
Canon (and Nikon, etc.) make their own tubes and charge a lot for them. Considering they are little more than hollow tubes, this is a good opportunity to save a buck by looking to third party manufacturers. I have personally owned a $170 set of three tubes by Kenko and a $85 set by ProOptic. The Kenko ones always felt a little too jiggly for my comfort and with several of them in use, the lens assembly would sag noticeably. The ProOptic design feels much stronger, and the tubes have a good solid mount that has almost no jiggle to it. Also, the ProOptic model will work with EF-s lenses. I have never owned a camera with the EF-s mount, but it is good to know the option is there.
I recommended the ProOptic tubes to a friend, Alex, and he has been happy with them as well. However, he did manage to run into some difficulty. Due to either overtightening when mounting the tubes, or trying to release them in the wrong direction, he sheared off a small piece of metal which stops the tube from turning once it is in proper mounting position. Possibly because of this, two of his tubes had become stuck together. I offered to fix the problem, and document the exercise here.
The patient
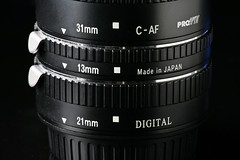
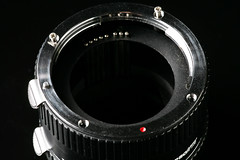
Shown here are his two tubes locked in their marital bliss. I will be picking them apart piece by piece.
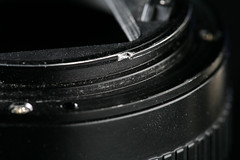
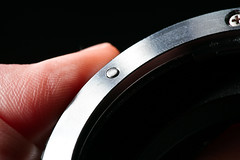
This is a detail of Alex's third (unstuck) tube and the identical one from my set. Rolling the mouse over the image will clearly show the broken piece of metal I was referring to. Clicking on the image will take you to Flickr where you can look at all the lovely nuanced specks of dust.
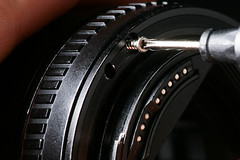
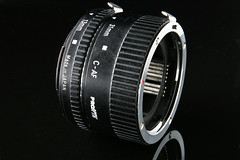
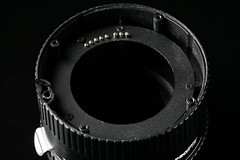
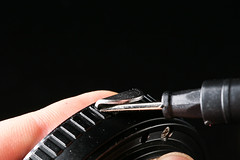
Jumping right in, I started removing accessible parts that might lead me deeper inside where I could reach the problem. Here I am attacking the camera body mounting ring with a remarkably tiny screwdriver.
Mouseover this image to show the tube with and without the ring. Notice that without the ring we can see more of the metal pins that run through the length of the tube. These continue the electronic connection between the camera and the mounted lens so you can still autofocus (with some difficulty) and stop down the aperture (to get even a shred more depth of field). Unfortunately, this approach did not lead me any closer to the guts of the tube, so I reattached the camera ring and unscrewed the lens mounting ring on the opposite side.
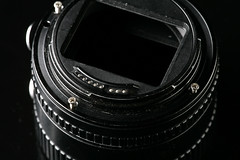
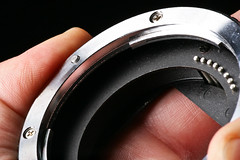
Mouseover to show with and without the lensmount. With the mount ring removed, we can see a spring-loaded metal button which releases whatever is attached to the tube (a lens, or another tube piggybacked on top for greater extension). There is also a black collar holding in place the other side of the metal pins. It is held there by four remarkably tiny screws.
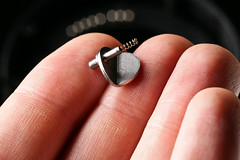
Here is that button and its accompanying spring. Shiny!
With and without the pin collar. The 8 pins are actually identical, but three of them are flipped upside-down so they sit at a different height to meet a different part of the lens.
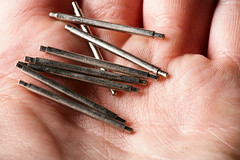
Here is a better look at the pins. The tips are long on one end and short on the other. When everything gets put back together, the orientation has to be correct. When taking apart any precise piece of gadgetry, it is important to take notes, or at least remember what screw came from where and which pins were long-side-up, etc. A lot of these parts are TINY and can easily roll or bounce away from you forever and that would be no type of fun. Especially the little black screws that held the pin collar on. Those were so small you could lose them in a tear duct. This is precisely why I never put screws in my tear ducts.
Dead end

I noticed that pushing the release button and twisting as hard as I could would cause the release pin to get stuck halfway in the down position. I tried sticking a small screwdriver in the space above the button and wiggling while turning the tubes. This pulled the pin out far enough that the tubes were able to spin freely and they came apart quite easily.
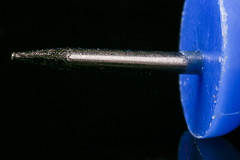
This is the release pin with the button pushed down all the way. As you can see, the pin would not recess far enough to clear the lens mount ring, and this was causing the binding. After close inspection I could see that the release button had become slightly bent and so it no longer had the leverage necessary to pull the pin down all the way.
A little prying with a screwdriver bent the button back into its original shape.
Success!
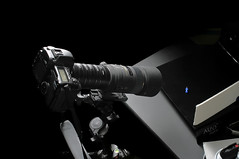
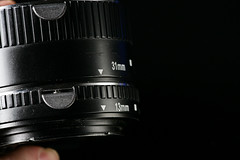
Now, with the release button pressed, the pin is totally clear and everything mounts and unmounts as it should. This was a fairly complicated solution to a simple problem, but it illustrates how I came to discover that the solution was so simple. Also it shows what the guts of an extension tube look like. With the problem solved, I found myself with two sets of working extension tubes and I wanted to see what 130mm of total macro extension would look like stacked next to my 150mm sigma macro. The magnification effect of an extension tube is related to the original focal length of the lens, and it is possible to overdo it. In fact, as the magnification increases, the distance of the focal point gets closer and closer. With too much extension for your lens' focal length, the focal point can wind up inside the lens! A long lens like the sigma macro can handle all this extension and it is useful if you need to check how sharp your thumbtacks are.
This one can use a little sharpening.